Manufacturer source check
Manufacturer sources checked 24 September 2026.
- Cure Time: The TDS requires at least 24 hours drying before sanding, with longer for cold weather or excess residue. This is a minimum sanding delay, not a universal full-strength cure time.
- Paintability: After adequate drying and sanding, stain, varnish or paint as desired. Prevent finish pooling in the joint. Test the finish first.
- Limitations: Interior only. Not for trafficable gaps wider than 3 mm. Do not infer allowable joint movement from the 500% elongation-at-break test.
- Directions for Use: Apply to clean, dry gaps, smooth with a spatula and wipe wet residue immediately. Wait at least 24 hours before sanding, longer if cold or residue is heavy; then stain or coat without pooling.
What is Selleys No More Gaps Timber Floors, and where should you use it?
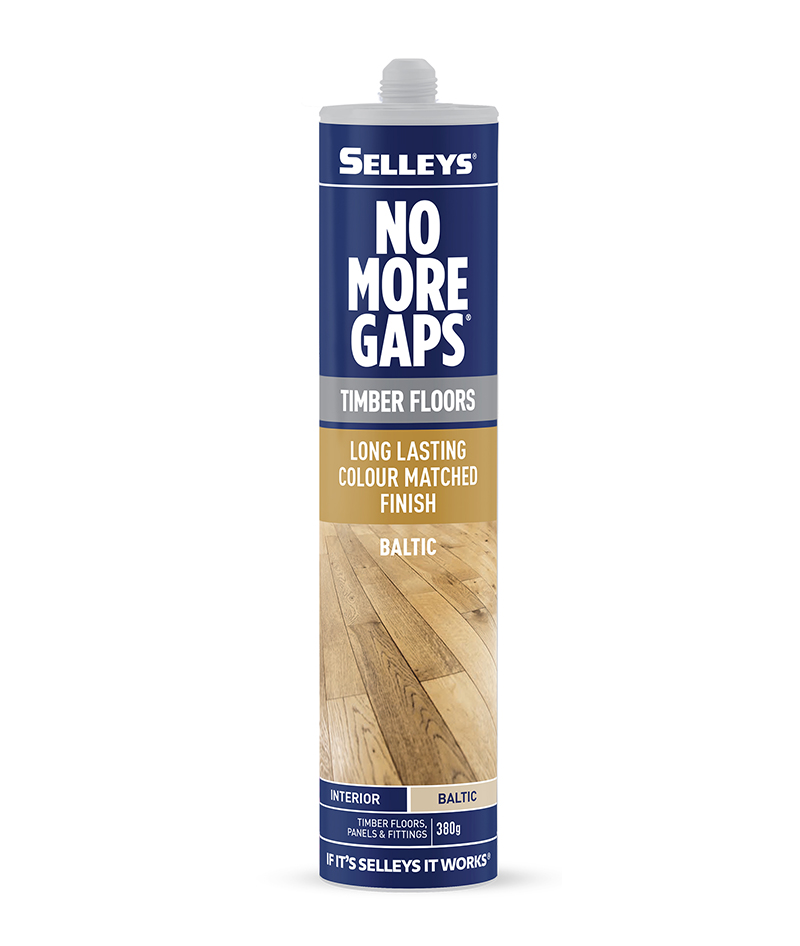
Selleys No More Gaps Timber Floors — called No More Gaps Timber Flooring, or No More Gaps Flexible Timber Flooring Gap Filler, on its technical data sheet — is a water-based flexible gap filler made specifically for filling and sealing gaps around and between tongue and groove timber flooring, and between other timber panels and fittings where extra flexibility is needed.
Two things separate it from a general filler. It is formulated to resist the movement of hardwood floorboards caused by temperature and humidity changes — the seasonal opening and closing that reopens gaps filled with a rigid product. And it contains real wood fibre, and comes in four timber colours, so the filled gap reads as timber rather than as a line of caulk. It is sandable and stainable.
Technical specification
| Property | Typical result |
|---|---|
| Technology | Water-based |
| Density | 1.30–1.35 |
| Skin time | 30 minutes |
| Peel strength (anodised aluminium) | +110 N |
| Shore A hardness | 50 |
| Elongation at break (ASTM D412) | +500% |
| Modulus at 100% elongation (ASTM D412) | 0.3 |
| Movement capability (ISO 9046) | 25% |
| Coverage | 18 metres with a 3mm bead |
| Packaging | 380 g cartridges |
Indicative data only, not intended for the preparation of specifications.
Colours and matching timbers
| Colour | Timbers |
|---|---|
| Jarrah | Jarrah, River Red Gum and Karri |
| Hardwood | Black Butt, Spotted Gum, Brush Box, Tasmanian Oak, Cypress and Beech |
| Walnut | Ironbark, Teak, dark stained timbers, engineered floors |
| Baltic | Pine, Myrtle, Alpine Ash |
What the key numbers mean in practice
Movement capability of 25% and elongation over 500% are the numbers doing the work in a timber floor. Boards swell in humid weather and shrink in dry weather, and that cycle is what defeats rigid fillers — they crack out of the gap in the first dry season. A filler that stretches a quarter of the joint width absorbs the annual cycle instead of fighting it.
Selleys is realistic about the limit of that: if timber movement is excessive and the movement capability is exceeded, re-apply the filler — and the same applies if you want a flush fill after the first application has settled.
Coverage of 18 metres with a 3mm bead from a 380 g cartridge is the figure to estimate with. A room with a hundred metres of board joints to fill is six cartridges, not one, and it is worth counting before you start rather than halfway through.
Skin time of 30 minutes gives a reasonable working window, but the 24 hour wait before sanding is the one that governs the schedule. Allow longer in colder weather, or if the residue left on the timber surface is excessive — which is a good argument for scraping off as much residue as you can with the spatula while the product is still wet, rather than planning to sand it all off later.
Where to use it
- Filling and sealing gaps in hardwood timber floors
- Around and between all types of timber panels and fittings
- Bedroom and kitchen fittings
- Benchtops
- Skirting boards and architraves
The product page adds that it suits timber floors including hardwood and engineered timber, and describes it as indoor use only.
How to apply it
- Prepare the surface. The surface to be filled must be clean, dry and free from dust.
- Cut the seal and nozzle to suit the width of the gap. Fit to the cartridge and insert it into a caulking gun.
- Apply with the caulking gun, forcing the product into the gap. If you are filling tongue and groove overlaps, make sure sufficient product goes into the gap.
- Press in and smooth off with a spatula. Take care not to drag the applied filler back out of the gap. Use the spatula to scrape off as much residue as possible from the timber surface, to minimise the sanding needed later.
- Clean up with a damp cloth immediately.
- Allow to dry for at least 24 hours before sanding off any residue from the timber surface. Allow longer in colder weather, or if the residue left on the timber is excessive.
- Stain and varnish or paint as desired. Make sure the stain or varnish is not allowed to pool in the joint — lightly wipe it off while wet if necessary.
Limitations — where it should not be used
- Not for gaps wider than 3mm in trafficable joints. This is the limitation most likely to be overlooked on a floor: a wide gap between boards that people walk across is beyond what this product is rated for.
- Not for exterior use. The product page puts the same point as indoor use only, and not suitable for constant moisture exposure.
- Not recommended for polyethylene, polypropylene or Teflon, per the product page.
- Store above 5°C.
Clean up and storage
Clean up with a damp cloth immediately after applying. The more residue you remove wet — with the spatula and then the cloth — the less sanding there is after the 24 hour wait. Store the product above 5°C.
Hazard classification
Classified as hazardous under Safe Work Australia GHS 7, with the signal word Warning.
- Skin sensitisation — Category 1. H317: may cause an allergic skin reaction.
Not classified as Dangerous Goods by the criteria of the Australian Code for the Transport of Dangerous Goods by Road & Rail or of New Zealand NZS 5433. Poison Schedule: not applicable.
What is in it
| Chemical entity | CAS number | Proportion (w/w) |
|---|---|---|
| 1,2-Benzisothiazol-3(2H)-one (BIT) | 2634-33-5 | <0.05% |
| 2-Methyl-1,2-benzisothiazol-3(2H)-one (MBIT) | 2527-66-4 | <0.05% |
| Non-hazardous or below reporting limits | — | Balance |
Everything declared here amounts to less than a tenth of one percent. BIT and MBIT are in-can preservatives — the additives that keep a water-based filler from spoiling in the cartridge — and that chemical class is the one most commonly behind an H317 on a product like this. The safety data sheet does not name a single cause, so read that as the likely explanation rather than a sourced one. What it does tell you is that the classification is not a function of dose: a trace of a potent sensitiser classifies a product just as a large quantity of a weak one would.
Sensitisation is a different thing from irritation. Irritation is a local reaction that settles once contact stops. Sensitisation is the immune system learning to react to the material: once acquired it is generally permanent, it can afterwards be set off by exposures far smaller than the one that caused it, and it tends to worsen with each subsequent contact rather than fade. It develops from repeated ordinary contact, and the sheet warns that effects may be delayed — a rash the next morning still belongs to yesterday's floor.
The exposure pattern on this job is a particular one. Filling a floor means working on your knees along the length of every board, pressing product into gaps with a spatula, scraping residue back off the timber, and wiping with a damp cloth — hour after hour, across a room. That is a lot of hand contact and a lot of contact between wet filler and the knees of your trousers. The precautionary statements on the sheet include P272: contaminated work clothing should not be allowed out of the workplace, and on a floor job that is a more literal instruction than it sounds.
The sanding step deserves its own note. The directions above have you wait at least 24 hours and then sand the residue off the timber surface. The safety data sheet carries P261: avoid breathing dust, fume, gas, mist, vapours or spray, and sanding a whole floor is the one point in this job that generates airborne dust in quantity. Use extraction or a dust mask and open the room up. It is also the strongest practical argument for the advice already on this page — scrape off as much residue as you can while the filler is still wet, because every gram you remove with a spatula is a gram you do not sand into the air.
Protection
- Gloves — nitrile rubber is suitable for intermittent contact. Selleys notes that glove construction and local conditions vary, so the final assessment is the user's.
- Eye protection — safety glasses; protective gloves and eye or face protection are specified together (P280).
- Dust protection when sanding — avoid breathing the dust (P261).
- Wash hands before smoking, eating, drinking or using the toilet. Take off contaminated clothing and wash it before reuse (P362+P364), and keep it out of the rest of the house (P272).
- Keep out of reach of children (P102).
First aid
| Exposure | What to do |
|---|---|
| Skin or hair | Effects may be delayed. Remove contaminated clothing and flush the skin and hair with running water; wash with plenty of soap and water. If a rash or irritation develops, get medical advice (P333+P313) — it may be an allergic reaction rather than simple irritation. |
| Eyes | Wash out immediately with water. In any case of eye contamination it is a sensible precaution to get medical advice. |
| Inhalation | Move the person away from the exposure without putting yourself at risk. Loosen tight clothing, let them rest comfortably and keep them warm until fully recovered. Seek medical advice if effects persist. |
| Swallowed | Rinse the mouth with water. Do not induce vomiting. Give a glass of water to drink. Give nothing by mouth to an unconscious person. If vomiting occurs, give more water and seek medical advice. |
If poisoning occurs, contact a doctor or the Poisons Information Centre — 131 126 in Australia, 0800 764 766 in New Zealand — with the container to hand, and follow the label (P101). Selleys emergency line: 1800 220 770 in Australia, 0800 220 770 in New Zealand.
What is Selleys No More Gaps Timber Floors designed for?
Selleys No More Gaps Timber Floors is designed for filling gaps around and between tongue and groove timber flooring, as well as between other timber panels and fittings.
What technology and packaging does No More Gaps Timber Floors use?
It is an acrylic-based (water-based) gap filler supplied in a 380g cartridge.
How long does No More Gaps Timber Floors take to fully cure?
The TDS requires at least 24 hours drying before sanding, with longer for cold weather or excess residue. This is a minimum sanding delay, not a universal full-strength cure time.
Can No More Gaps Timber Floors be painted?
Yes, it can be painted once it is fully cured.
Is No More Gaps Timber Floors suitable for outdoor use?
Interior only. Not for trafficable gaps wider than 3 mm. Do not infer allowable joint movement from the 500% elongation-at-break test.
What materials should not be used with No More Gaps Timber Floors?
It is not recommended for use on polyethylene, polypropylene, or Teflon® surfaces.
What colour options are available and what timber types do they match?
According to the knowledge base, colour options include Jarrah (for Jarrah, River Red Gum, Karri), Hardwood (for Black Butt, Spotted Gum, Brush Box, Tasmanian Oak, Cypress, Beech), Walnut (for Ironbark, Teak, dark-stained timbers, engineered floors), and Baltic (for Pine, Myrtle, Alpine Ash).
What is the water resistance level of No More Gaps Timber Floors?
The product has low water resistance.
What are the directions for using No More Gaps Timber Floors?
Apply to clean, dry gaps, smooth with a spatula and wipe wet residue immediately. Wait at least 24 hours before sanding, longer if cold or residue is heavy; then stain or coat without pooling.
What is the recommended application and service temperature range for this product?
The application temperature range is 5°C to 35°C, and the service temperature range is -20°C to 70°C.
What materials is No More Gaps Timber Floors suitable for?
It is suitable for timber floors, wood, and MDF.
Images on This Page
-
https://www.selleys.com.au/media/cseezadf/selleys-logo-tagline_752x360.png?rmode=boxpad&ranchor=center&width=188&height=90&format=webp&quality=90
Selleys: Adhesives | Sealants | Putty Fillers | Glues | Cleaning Products - Australia
-
https://www.selleys.com.au/images/productpagev2/loading.gif
(no alt text)
-
https://www.selleys.com.au/media/elhikrnf/nmg-timber-floor-baltic-380g_usp.jpg?rmode=max&ranchor=center&width=440&height=440&format=jpg
https://www.selleys.com.au/media/elhikrnf/nmg-timber-floor-baltic-380g_usp.jpg?rmode=max&ranchor=center&width=440&height=440&format=jpg
-
https://www.selleys.com.au/media/euyjtpr1/nmg-timber-floor-baltic-380g_front.jpg?rmode=max&ranchor=center&width=440&height=440&format=jpg
https://www.selleys.com.au/media/euyjtpr1/nmg-timber-floor-baltic-380g_front.jpg?rmode=max&ranchor=center&width=440&height=440&format=jpg
-
https://www.selleys.com.au/media/xfmh0fwr/nmg-timber-floor-baltic-380g_back.jpg?rmode=max&ranchor=center&width=440&height=440&format=jpg
https://www.selleys.com.au/media/xfmh0fwr/nmg-timber-floor-baltic-380g_back.jpg?rmode=max&ranchor=center&width=440&height=440&format=jpg
-
https://www.selleys.com.au/media/x2ni00xe/nmg-timber-floor_range.jpg?rmode=max&ranchor=center&width=440&height=440&format=jpg
https://www.selleys.com.au/media/x2ni00xe/nmg-timber-floor_range.jpg?rmode=max&ranchor=center&width=440&height=440&format=jpg
-
https://img.youtube.com/vi/tF02LhePNI0/0.jpg?rmode=max&ranchor=center&width=440&height=440&format=jpg
https://img.youtube.com/vi/tF02LhePNI0/0.jpg?rmode=max&ranchor=center&width=440&height=440&format=jpg
-
https://www.selleys.com.au/images/productpagev2/pdp-share-icon.png
Share
-
https://www.selleys.com.au/media/2cvfafft/nmg-interior-interior-fast-dry.jpg
No More Gaps Interior Fast Dry
-
https://www.selleys.com.au/media/kl5buih3/nmg-exterior.jpg
No More Gaps Exterior
-
https://www.selleys.com.au/media/zateuucz/nmg-interior-kitchen-bathroom.jpg
No More Gaps Kitchen & Bathroom
-
https://www.selleys.com.au/media/lldlndgs/nmg-interior-timber-floors.jpg
No More Gaps Timber Floors
-
https://www.selleys.com.au/media/cegeahng/nmg-interior-coloured-gaps.jpg
No More Gaps Coloured Gaps
-
https://www.selleys.com.au/media/hveltww1/nmg-interior-bricks-mortar.jpg
No More Gaps Bricks & Mortar
-
https://www.selleys.com.au/media/5e4hnj22/nmg-interior-interior-multipurpose.jpg
No More Gaps Interior Multipurpose
-
https://www.selleys.com.au/media/35hfwmv0/nmbg-expanding-foam.jpg
No More Big Gaps Expanding Foam
-
https://www.selleys.com.au/media/a0gpbwbz/carousel-image-2.jpg?rmode=crop&ranchor=center&width=524&height=350&format=webp&quality=90
/media/a0gpbwbz/carousel-image-2.jpg
-
https://www.selleys.com.au/media/h50b31x5/carousel-image-3.jpg?rmode=crop&ranchor=center&width=524&height=350&format=webp&quality=90
/media/h50b31x5/carousel-image-3.jpg
-
https://www.selleys.com.au/media/ttdjmcgp/carousel-image-1.jpg?rmode=crop&ranchor=center&width=524&height=350&format=webp&quality=90
/media/ttdjmcgp/carousel-image-1.jpg
-
https://www.selleys.com.au/media/n51b00gp/carousel-image-4.jpg?rmode=crop&ranchor=center&width=524&height=350&format=webp&quality=90
/media/n51b00gp/carousel-image-4.jpg
-
https://www.selleys.com.au/media/kxcg2qlk/about-no-more-gaps.jpg?rmode=crop&ranchor=center&width=614&height=353&format=webp&quality=90
About No More Gaps